;)

In this case study:
Client: DC Child and Family Services Agency
Industry: Public Sector
Products and Services:
Microsoft Power Platform
Microsoft Dynamics 365
Microsoft Azure Cloud
Location: Washington, DC

About CFSA
The DC Child and Family Services Agency (CFSA) is the primary public child welfare agency in the District of Columbia, entrusted with the crucial responsibility of safeguarding child victims and those vulnerable to abuse and neglect, while also providing vital assistance to their families. As a dedicated agency, CFSA is committed to ensuring the well-being and safety of children in the community, working diligently to prevent harm, intervene in cases of maltreatment, and support families in need.
The Need for Online Access to Social Assistance
The COVID-19 pandemic shed light on the inefficiencies ca used by manual forms and systems in place for the public to apply for assistance and essential child welfare services. The agency knew that to provide the best possible support to children and families, it needed to modernize its processes and make the application processes efficient and accessible online and mobile. More specifically, the agency wanted to make it easier to administer a subsidy program that gives financial aid to grandparents and close relatives caring for minor children whose parents cannot care for them.
CFSA partnered with Quisitive and collaboratively, they undertook a tight seven-month transformative project to introduce a Kinship Navigator platform to streamline child welfare subsidy application processes, optimize accessibility, and bolster support for DC’s community. The Quisitive team worked closely with the Agency to create a public-facing portal and mobile app to process subsidy applications. The result has been a transformation is how the public and staff process and track applications, and has resulted in more families gaining access to essential financial aid that helps to keep children safe and with their families.
Getting the Kinship Navigator App Up and Running
Through close collaboration with CFSA, Quisitive’s team conducted extensive discovery and research, pinpointing pain points in existing workflows and strategically devising automated processes for a comprehensive and user-friendly public website and application. Leveraging Microsoft’s Power Platform Power Pages, Dynamics 365, and Azure Cloud, as the core technology stack, Quisitive was able to develop an intuitive website and mobile application that allows families to submit applications, upload documents, and track important information they need to receive essential services and financial aid.
“Our experience with Quisitive was great. We were under a very tight deadline they brought a team together with different skills across user experience, software development, and mobile development. It is amazing how much work we got done in a short timeframe and produced an excellent product.”
Issa Barkett, Project Manager, CFSA
“When designing the Kinship Navigator platform, we needed to ensure that grandparents and close relatives could access the app and web portal easily. We used a user-centered design to ensure the platform was simple to use and could help these families navigate this process as easily as possible.”
Mark Nagao, Power Platform Solution Architect, Quisitive
Keeping DC Families Together
Since the rollout of the Kinship Navigator program, CFSA has experience a drastic uptake of applications for social services. Close to 8,000 families have accessed and used the app and website.
- Reduction in foster care entries
- More families gaining access to vital services and support
- Better child safety and security
- Faster processing of applications and reduced administrative time and costs
“The Kinship Navigator app helps us to achieve our mission of keeping families together. Any delays in families trying to access services could mean that a child is separated and ends up in foster care and this application solves that.”
Robert L. Matthews, Agency Director, CFSA

Working with Quisitive was seamless. They became an extension of our team. They took the time to understand our organization and users and brought our vision to life.”
Empowering Child Welfare: A Transformative Journey with Quisitive
Quisitive’s indispensable role in revolutionizing child welfare services in DC has left an enduring positive impact on vulnerable children and families, reinforcing the power of technology in fostering positive change and social well-being.
“We loved developing this solution with CFSA. Knowing that this technology impacts people’s lives and helps make their situations better is very rewarding, and is why we do what we do.”
Mark Nagao, Power Platform Solution Architect, Quisitive
The Run Scripts feature in Microsoft System Center Configuration Manager (SCCM) was added as a preview feature in build 1706. It was officially released as of build 1802.
What does SCCM ‘Run Scripts’ feature do?
The Run Scripts feature allows running of PowerShell scripts on remote devices in real time, rather than having to prepare a Package or Application, and going through the usual motions to distribute content and deploy the actions. The goal was/is to enable site administrators to execute tasks in real-time for situations which using the traditional (and slower) processes isn’t quick enough to avoid urgent risks or address time-sensitive needs.
If you’re familiar with the “right-click tools” which have been around for many years, this is a similar capability, except that you author your own tools. While the assumption some have is that this feature is intended to return results or values to the console, that is not a requirement. You can deploy a script to restart a service, modify a setting, or anything you wish, and it’s up to you to decide if you want a result to be returned to the console, and what that result should be. So, for example, if you don’t like zero (0) as a success code, you can trap the result and if it equals zero, return your own result of “Success” and so on.
There are some limitations to what this feature can do, but don’t be surprised if these change with future build releases. More information about requirements, limitations and best practices can be found here.
Setting It Up
Once you are on the latest current branch release (1802), and your clients meet the minimum requirements, you are ready to get started. There are only a few moving parts to this feature, but most of them are trivial to configure. In a nutshell:
- Enable the feature
- Configure Script Approval
- Create a Script
- Approve the Script
- Deploy the Script
Enable the ‘Create and Run Scripts’ Feature
To enable this feature, go to Administration / Updates and Servicing / Features and look for “Create and Run Scripts”. Then make sure it is set to “On”. If not, right-click and select Turn On.

Configure Script Approval
After the feature is enabled, you may want to turn off a default setting which prevents script authors from approving their own scripts. This is only recommended during testing/piloting. As a “best practice” it should be enabled for production environments as an added layer of security and configuration control.
The setting is found on the Hierarchy Settings form, which is under Administration / Site Configuration / Sites. On the General tab, at the bottom you’ll find “Script authors require additional script approver”.

PowerShell Script Creation
Creating a script is easy. You can either enter your code in the form, or import code from a .PS1 file. This example will enter code directly into the text box in the form.
- Go to the “Software Library” node of the administration console
- Select “Scripts” (appears at the bottom of the list of features)
- Select “Create Script” on the Ribbon Menu (or right-click and choose “Create Script”)
- Provide a name: Refresh Group Policy
- Enter PowerShell code: GPUPDATE /FORCE
- Click Next
- Click Next again
- Click Close
Approve the Script
Only approved scripts will be available for selection when using the feature on managed devices. By default, a new script is unapproved until explicitly approved by someone with sufficient permissions. To approve a script:
- Select the script (Software Library / Scripts)
- From the Ribbon menu, click “Approve/Deny” (or right-click and choose “Approve/Deny”)
- Click Next
- Select Approve, and enter an Approver comment.
- Click Next
- Click Next again
- Click Close
Note: The approver comment is optional, but strongly recommended if you want to enforce change control in your environment. The “Approver” field reflects the user who actually clicked on the form, but the comment would be for who or what approved the script in production, such as a Change Request number, Service Ticket number, etc.
Deploy the PowerShell Script
You can deploy scripts to individual devices or Device Collections. You can cherry-pick multiple devices within a Collection as well as deploying to the entire Collection.
5 Sample Scripts
The examples below are only for demonstration purposes, and do not include error/exception handling or documentation, comments and so on.
1 – Check if Hyper-V is Installed
Check if Hyper-V is installed and running on a client with Windows 10 (1709 or later)…
if (Get-Service vmms -ErrorAction SilentlyContinue) {Write-Output "Hyper-V installed"}
2 – Restart the SCCM Client Service
Restart the client SMS Agent Host service…
Stop-Service ccmexec -Force; Start-Service ccmexec
3 – Show File Properties
Show version of Chocolatey installed…
Write-Output (Get-Item "$($env:ProgramData)chocolateychoco.exe" -ErrorAction SilentlyContinue).VersionInfo.FileVersion
4 – Install Chocolatey
Install Chocolatey, if not already installed…
if ($env:ChocolateyInstall) {
Write-Output "Installed already"
}
else {
Set-ExecutionPolicy ByPass -Scope Process -Force
Invoke-Expression ((New-Object System.Net.WebClient).DownloadString("https://chocolatey.org/install.ps1"))
Write-Output "Installing now"
}
5 – Get a Registry Value
Display the last Windows Update downloads purge time…
(Get-Item -Path "HKLM:SOFTWAREMicrosoftWindowsCurrentVersionWindowsUpdate").GetValue("LastDownlo
adsPurgeTime")
Summary
These are only a few, very basic, examples of what you do with the run PowerShell script feature in Configuration Manager. The possibilities are almost limitless, but you should definitely read more about this feature on the Microsoft documentation portal (link) before going further. As with most technologies, there are trade-off issues to consider, and every environment has its unique constraints and possibilities. However, this small change to Microsoft Configuration Manager opens up a whole new world of capabilities to make device management easier and more efficient than ever before.
Ready to transform your corporate budgeting, planning, reporting & corporate performance management? We can help!
With over 30 years of experience helping companies implement and optimize corporate performance management software, our team of experts is here to help analyze your existing processes and recommend the right solution to meet your needs.
I was spinning up Windows Autopilot in a new customer’s tenant and got hit with this message during the Windows Out-of-Box experience (OOBE).

Something went wrong.
Looks like we can't connect to the URL for your organization's MDM terms of use. Try again, or contact your system administrator with the problem information from this page.
Additional problem information:
Error: invalid_client
Error subcode:
Description: failed%20%to%20%authenticate%20user
The most interesting Google/Bing/DuckDuckGo search result was on a MSDN forum, but that didn’t seem to make sense for this tenant.
For this tenant / scenario, the solution was really simple… the user wasn’t licensed for Microsoft Intune or Azure AD Premium.
When working with a customer recently we needed to deploy the Azure Virtual Desktop client for Windows with Microsoft Intune but noticed an oddity that the MSI system-based installer was being detected by Intune as a user-based installer. A bit of bingooglefoo on the Interwebs landed me at an article by Alex Durrant on the issue. Alex was dealing with an older version before Microsoft renamed Windows Virtual Desktop to Azure Virtual Desktop, but the client installer is the same.
Understanding Alex’s approach of telling Intune that this is NOT a MSI based install when creating the .IntuneWin wrapper file led me to a simpler solution than bootstrapping the MSI with the PowerShell Application Deployment Toolkit, awesome as that is.
A simpler method is to tell IntuneWinAppUtil.exe that we are running a batch file, not an MSI.

The contents of the batch file is simple the command lines that need to be executed for the install and uninstall of the MSI. However, this is just a placeholder or note, it isn’t actually used.
When setting up the Win32 app in Intune, the MSI properties will not be autodetected, but entering them manually works just fine.

For reference, here’s the commands and detection rule
Install command: msiexec.exe /i "RemoteDesktop_1.2.2459.0_x64.msi" /l*v "C:\Windows\Logs\Azure Virtual Desktop Windows client_1.2.2459.0_x64.log" /quiet ALLUSERS=1
Uninstall command: msiexec.exe /x "{72E41EC7-55E9-4B2A-B5F4-961E0DA45913}" /l*v "C:\Windows\Logs\Azure Virtual Desktop Windows client_1.2.2459.0_x64_Uninstall.log" /quiet
Detection rules: MSI {72E41EC7-55E9-4B2A-B5F4-961E0DA45913}
That’s it. All of the goodness you expect without the fluff.
Monitoring the health of physical or virtual systems should focus on four key pillars: Availability, Performance, Security, and Configuration (please note, this is a concept that I have shamelessly stolen from my experiences working with System Center Operations Manager for more than a decade). Availability focuses on the system being able to be accessible and being online. System performance focuses on the key performance indicators (KPI’s) that determine how well a system is functioning. Security focuses on logically enough how the resource is secured, and Configuration focuses on how the system is configured. Each of these focus areas needs to have effective alerting and a method to visualize the state of these areas (generally done through dashboards). Today’s blog post will focus on two of those areas: Performance and Availability.
Performance monitoring & Simulating performance failures
Performance monitoring for systems focuses on four KPI’s: Disk, CPU (Processor), Memory, and Network. To develop effective alerting for the performance of systems, you need a way to test failure conditions to validate that they alert as expected. As an example, if you are monitoring for low disk space conditions you need a way to cause a disk to go to a warning level and error level condition to validate that the alert fires as expected. These are the methods I recommend to quickly test the health of each of the four KPI’s:
Disk
While there are other factors to disk health from a performance perspective, the primary one to focus on is the amount of free disk space that exists on a drive. To cause a failure condition there are two quick tricks I am aware of:
- To quickly fill up a disk for testing of low disk space conditions, open disk management, pick the disk, create a VHDX (larger size drive), and choose a fixed size. If you allocate this to the right size it will cause a low disk space condition to occur.

- You can also try this trick from Steve Buchanan using a tool called Philip: Simulate low disk space to trigger SCOM alert | Buchatech.com
CPU
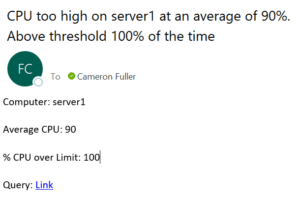
The primary metrics for CPU performance health are the % Processor and the Processor queue. This tool provides a way to quickly generate a high CPU situation:
- There is an easy-to-use tool available online that stress tests the CPU (https://cpux.net/cpu-stress-test-online).

You can also take a page from the Gamer’s notebook and use some of the tools that they recommend for stress testing. However, their focus is slightly different as they are pushing to identify errors or check the specifications on systems versus what is being attempted within this blog post.
Memory
To simulate a low available memory condition, check out Testlimit from Sysinternals. Sample command syntax from here:
testlimit64.exe -d 4096 -c 1

Network
SolarWinds provides a free 14-day evaluation of a solution that they call “WAN Killer“. It was really easy to use and worked like a champ to simulate a heavily used network connection.

The tools listed above provide a way to simulate conditions where alerts would fire due to an unhealthy state of the core KPI’s for systems.
Availability monitoring & Simulating availability failures
Availability monitoring for systems focuses on receiving a heartbeat from a system, if the system can be reached via the network (ping), as well as stability items such as Operating System crashes and Application crashes.
Heartbeat
To simulate heartbeat failures, simply stop the service that is providing the heartbeat. As an example, if you are using Log Analytics to provide heartbeat monitoring the agent is currently the Microsoft Monitoring Agent. This agent runs as a service that can be shut down to simulate a heartbeat failure.
Ping
To simulate a ping level failure, either shut down the system or use the Windows Firewall to block traffic to the system from the system you are using to perform the ping testing.
Application crashes
To simulate an application crash, I found “Bad Application” to be the easiest to use.

Operating System crashes
So far, I haven’t found an effective way to simulate Operating System crashes.
Update 8/31/21: On Twitter, Steve Burkett (Steve Burkett (@steveburkett) / Twitter) pointed out that NotMyFault from Sysinternals! Check it out at: NotMyFault – Windows Sysinternals | Microsoft Docs
Reference links:
- Creating next generation of CPU queries in Log Analytics
- How to visualize free disk space available in Azure | SquaredUp
At Quisitive, we regularly meet with customers who have concerns about security. It seems that we are bombarded daily with news stories regarding Malware and/or ransomware. With the constant level of threat, it’s no surprise that companies are looking for ways to meet rising security concerns in order to avoid a costly disaster.
To address these concerns in the case of Microsoft 365 and Azure security, we start with a Workplace Modernization Assessment where we ask questions that expose gaps in an organization’s security. Our goal is to poke as many holes as possible so we can provide feedback and advice on how to improve.
From there, we provide customers with recommendations catered to their specific organizational and industry needs. In this article, I’m going to share our most common scenarios and recommendations to provide insights into how Microsoft 365 and Azure’s native features can improve security and compliance for your organization.
E3 vs E5 Licensing Upgrades
When organizations sign up for their Office 365 licenses, it’s not uncommon for them to select the mid-tier option, Office 365 E3. This license includes business services such as email, file storage and sharing, Office for the web, meetings, and IM, as well as limited security and compliance capabilities.
So why upgrade to E5 licenses for your organization’s users? It comes down to the additional robust security features that it brings to Microsoft 365. Here are just a few of the added and improved security features that come with the E5 license:
- Privileged Identity Management – Gain a better overview provides Just-In-Time access to privileged accounts and virtual machines, meaning
- Risk Based Conditional Access – Limit data access based on location, device, user state, and application security
- Machine Learning-based detection of suspicious patterns of data access – Leverage larger Azure touchpoints for risk identification and identify abnormal data access patterns that might indicate malware
- Contextual Multi–Factor Authentication Challenges – Ensure multi-factor authentication is set up for your users. Multi-Factor Authentication should be a primary area of focus for all organization because it adds an extra layer of security, requiring the user to provide two or more areas of identity using PINS, Smartcards fingerprints, retina scans, or voice recognition.
- Microsoft Cloud App Security – Limit cloud app usage by user, device, or location and better secure potentially weak SaaS apps
- Data Classification – Classify and label data based on sensitivity and identify data in files that are potentially dangerous
Enable Security Default Features in Azure AD
Azure Active Directory (Azure AD) is Microsoft’s cloud-based identity and access management service, which helps your employees sign in and access resources in external resources, such as Microsoft 365 or the Azure Portal, as well as internal resources, such as apps on your corporate network and intranet. This a common choice for boosting Azure security.
When using Azure AD, we recommend our clients turn on the security default features that come with Azure Active Directory. This includes features like requiring multi-factor authentication for all users, blocking legacy authentication protocols, and protecting privileged activities such as access to the Azure portal.
Activating these features is a quick way to get started on the road to improving security in your organization with minimal experience.
Governance Documentation
An easy step towards creating a more secure environment for your organization is proper governance documentation. This documentation is your organization’s toolkit – it should identify processes for handling security risks, including key frameworks for managing issues and who to turn to when a problem arises.
A detailed governance document means that your organization always has a plan and won’t waste precious time forming one if and when a threat is detected. You are able to jump into action and resolve the issue before it grows worse. Keeping your governance documentation up-to-date and accessible is key to further protecting your organization.
Train Your Teams
Technology is only part of the equation. It’s important to remember that the technology is only effective when your people know how to use it to its full potential.
Knowledge sharing is key to protecting both employees and the business from security incidents and potentially, security breaches. We recommend that organizations spend appropriate time and resources to educate their employees, whether through training courses online or workshops with a partner like Quisitive. These efforts make all the difference when your employees encounter phishing attempts or other potential threats.
I hope you’ve learned a few ways that you can begin to improve Microsoft 365 and/or Azure security for your organization and gain some peace of mind.
In my last blog post, I likened the Azure assessment to flying a plane to Fiji. Before you’re over the ocean, you need an expert by your side to prepare you for the journey. And once you’ve taken off from the airport, you need someone to guide you in flight.
With your Azure assessment completed, your team now understands the end goals for your migration to the cloud. You have that critical data needed for calculated decision-making. It’s time to land, step onto the glistening white sand, and begin your adventure on Fiji.
Or the Azure cloud.
To migrate with maximum efficiency and gain maximum results, we need to nail the following:
1. We need to map the terrain
Whenever I travel, I start with maps to understand the terrain. For an IT environment, maps aren’t always available. Or they’re far from accurate. But old and forgotten documents are better than nothing, so we gather what we can find. This includes network diagrams, reference architecture, storage architecture, DR plans, backup and retention policies, SLAs, RPOs & RTOs, tier one application lists, application dependency mapping, application owners and SMEs, server naming conventions, or a CMDB. Old maps occasionally point to buried treasure.
Even if not current, they provide a basis for validating the expected environment. We work with your team to fill in the vital gaps as we design the new framework in Azure. Documentation helps determine the requirements for specific applications and workloads when operating in Azure. But it’s only a starting point. Maybe some applications are no longer business critical, but others have taken on added importance in daily operations. We want to know who can validate the workloads for failover testing in Azure. For legacy systems, the original owner may no longer be with the company, so we need to determine an alternate owner.
Even if we don’t have any documents, the same considerations need to be made before your migration. With Quistive as your expert guide, we cover this with your team. And in all cases, we work to integrate your requirements with best practices in Azure and help make your migration a raging success.
2. We need a logical plan
I’m a lazy traveler. I don’t want to have every minute scheduled, especially with a backdrop like the sultry South Pacific. In Fiji I’d meander, explore, and ditch my phone under the nearest coconut tree. But that’s a dangerous way to run a migration project.
For a migration to be successful, we need to know as much as we can up front, creating as detailed a plan as is logical, one that encompasses the duration of the project. After determining the VMs in scope, we work with your team to map all the system dependencies, including data sources, services, or the odd process that hits once a week. We need to determine which servers need to be migrated together. Depending on the size of the estate, we establish a number of larger migration groups or waves that will be processed in the same time frame. For those of you with an agile bent, think of these as migration sprints because we apply the same principles. Lessons learned from each migration wave are adopted into the next round, refining the process for your particular estate.
We employ a tiered testing methodology for different workloads, and we work with your team to define the testing requirements for every one of your applications before we migrate. We also consider your SLAs, your blackouts, the availability of your SMEs and application testers. We establish a migration cadence that matches the ability of your team to absorb the change. When we migrate, we can adjust that pace to suit your business needs.
During the migration, we know your team still has day jobs. While we do the heavy lifting, they can participate as much as they want for knowledge transfer and to develop the skill set for sustained operations in Azure
3. We need superior communications
When I’m tripping down the beach, I enjoy surprises–finding a rogue stingray gliding in the surf or a wary crab sidling anxiously away from me. But surprises in IT operations are rarely welcome.
Before beginning a migration, it’s important to inform everyone within the organization about the project. People react better to change when they have information and feel some ownership in achieving the goals. We need to communicate early, often, and clearly. An integral part of the migration plan is the communication plan. Not everyone needs the same level of detail or frequency of information. Each stakeholder needs to have a comms channel appropriate to their involvement. Some we send a weekly email, while others we might need on speed-dial. We can also collaborate real-time in a Teams channels and reduce the email traffic.
Whatever your needs, we work with you to plan for consistent information to flow from the project team to the sponsors and stakeholders, and to plan for contingencies. It’s rare when a project develops exactly as planned. Situations may arise that require a new tack, a different solution, or an unanticipated decision. While we can’t eliminate every surprise, we can develop a comprehensive plan for responding when they occur. We determine who to notify, who to consult, and who will make any required decisions. Meaningful information mitigates risk. A superior communications plan will enable a smooth migration and keep your stakeholders informed of your project progress and success.
Want to learn more about how we approach migration? Learn about our suite of On-Ramp to Azure including our Azure Cloud Assessment.
So you need to perform a hard policy reset on a few (or a lot) of ConfigMgr client computers because they seem to be stuck? PowerShell to the rescue!
If you only need to reset policy on a few computers, just run this command
$Computers = Get-Content -Path "C:\Temp\PolicyRefresh.txt";
$Cred = Get-Credential;
ForEach ($Computer in $Computers) { Write-Host "Resetting ConfigMgr client policy on $Computer"; Invoke-WmiMethod -Namespace root\CCM -Class SMS_Client -Name ResetPolicy -ArgumentList '1' -ComputerName $Computer -Credential $Cred -ErrorAction Stop }
But if you have a bunch to wade through or you want logging, status, etc., this script should do the trick.
The full and latest code can be obtained from GitHub. https://github.com/ChadSimmons/Scripts/blob/default/ConfigMgr/Troubleshooting/Reset-MECMClientPolicy.ps1
################################################################################################# #BOOKMARK: Script Help
#.SYNOPSIS
# Reset-MECMClientPolicy.ps1
# Purge existing ConfigMgr client policy (hard reset) and force a full (not delta) policy retrieval
#.PARAMETER ComputerName
# Specifies a computer name, comma separated list of computer names, or file with one computer name per line
#.PARAMETER Action
!!! one two skip a few.... !!!
ForEach($Computer in $ComputerName) {
$iCount++; Write-Progress -Activity "[$iCount of $TotalCount] Resetting ConfigMgr Client local policy" -Status
$Computer $ComputerStatus = [PSCustomObject][ordered]@{ ComputerName =
$Computer; Status = $null; Timestamp = Get-Date }
try {
If ($Cred) {
$Client = Get-WmiObject -Class SMS_Client -Namespace root\ccm -List -ComputerName $Computer -ErrorAction Stop -Credential $Cred
} Else {
$Client = Get-WmiObject -Class SMS_Client -Namespace root\ccm -List -ComputerName $Computer -ErrorAction Stop }
}
catch {
$ComputerStatus.Status = "WMI connection failed"
Write-LogMessage -Message "[$Computer] $($ComputerStatus.Status)" -Type Warn -Verbose
}
If ($Client) {
try {
$ReturnVal = $Client.ResetPolicy($Gflag)
$ComputerStatus.Status = 'ResetPolicy Success'
...
You’ll get console output like this

And, you’ll get CMTrace style logging like this

And it may even fix the annoying problem when computers won’t report software update deployment status like these.

Thanks Seth for the inspiration and Rob for enduring my testing.
Back in the day, Microsoft had a utility (uptime.exe) which was incredibly useful when managing many servers. It showed how many days the computer had been running since its last boot. This is particularly useful when troubleshooting issues.
Up until PowerShell 6.0, this was not available natively as a cmdlet. Sure, you could use a WMI cmdlets to get the last boot entry, but you then had to convert it to DateTime object and use math – not ideal when troubleshooting. So, I wrote this script to help get the last boot time on any windows computer that has older versions of PowerShell. One feature this script has over Microsoft’s is that you can specify a remote computer. It uses WMI, so if you allow WinRM, then this should work.
You can either use the script (.ps1) or copy the code as a function into your windows PowerShell profile (see code below). I personally have it in my windows PowerShell profile, that way it loads every time I open a new console.
Script available here: Get-Uptime
<####################################################################################
Author: Tino Hernandez
Version: 1.0
Date: 03/15/2021
.SYNOPSIS
This cmdlet returns the time elapsed since the last boot of the operating system.
The Microsoft Get-Uptime cmdlet was introduced in PowerShell 6.0, however you
can use this script on older versions of PowerShell. For more
information on Microsoft cmdlet, see the following link.
https://docs.microsoft.com/en-us/powershell/module/microsoft.powershell.utility/get-uptime
.DESCRIPTION
This cmdlet returns the time elapsed since the last boot of the operating system.
Additionally, this can also retrieve from remote computer.
.PARAMETER ComputerName
Required : No
DataType : String
Description : This will be used to specify the computer name. If blank, it will be
set to $env:COMPUTERNAME
.PARAMETER Since
Required : No
DataType : Switch
Description : this will return a DateTime object representing the last time that the
computer was booted.
.EXAMPLE
Get-Uptime
Get-Uptime -Since
Get-Uptime -ComputerName Server01 -Since
#######################################################################################>
Function Get-Uptime{
Param(
[Parameter(Mandatory=$false)]
[string]$ComputerName,
[Parameter(Mandatory=$false)]
[switch]$Since
)
# Check if computer name is supplied, if not set default to local machine
IF([string]::IsNullOrEmpty($ComputerName)){
$ComputerName = $env:COMPUTERNAME
}
# Calculate last boot time
IF($Since.IsPresent){
[System.Management.ManagementDateTimeconverter]::ToDateTime($(Get-WmiObject -ComputerName $ComputerName -Class Win32_OperatingSystem | Select-Object -ExpandProperty LastBootUpTime))
}ELSE{
(Get-Date) - [System.Management.ManagementDateTimeconverter]::ToDateTime($(Get-WmiObject -ComputerName $ComputerName -Class Win32_OperatingSystem | Select-Object -ExpandProperty LastBootUpTime)) #| FT Days,Hours,Minutes,Seconds -AutoSize
}
}
There have been many scripts and solutions written for cleaning up unnecessary files on Windows computers to free up disk space. I’ve used several over the years, but nothing out on the interwebs fit what I thought was the best approach which is
- delete files that you KNOW are not needed
- delete progressively “riskier” types of content until the required minimum free space is achieved
- delete files in the safest way possible by excluding certain subfolders and protecting known critical folders
- log everything
The solution logs the beginning and ending free space and cleans up the following items
- Windows memory dumps
- System temp files (C:\Windows\Temp)
- Windows Update downloads and ConfigMgr cache content for software updates
- Compress (compact) certain folders on NTFS volumes
Until the requested free space is achieved, the following tasks are run
- Purge ConfigMgr Client Package Cache items not referenced in 30 days
- Purge ConfigMgr Client Application Cache items not referenced in 30 days
- Purge Windows upgrade temp and backup folders
- Purge Windows Update Agent logs, downloads, and catalog
- Purge Windows Error Reporting files using Disk Cleanup Manager
- Purge Component Based Service files
- Cleanup User Temp folders: Deletes anything in the Temp folder with creation date over x days ago
- Cleanup User Temporary Internet Files
- Purge Content Indexer Cleaner using Disk Cleanup Manager
- Purge Device Driver Packages using Disk Cleanup Manager
- Purge Windows Prefetch files
- Purge Delivery Optimization Files
- Purge BranchCache
- Cleanup WinSXS folder
- Run Disk Cleanup Manager with default safe settings
- Purge System Restore Points
- Purge ConfigMgr Client Package Cache items not referenced in 1 day
- Purge ConfigMgr Client Package Cache items not referenced in 3 days
- Purge ConfigMgr Client Application Cache items not referenced in 3 days
- Purge C:\Drivers folder
- Delete User Profiles over x days inactive
- Purge Recycle Bin
Get the full script and latest version on GitHub.
#.SYNOPSIS
# Clean-SystemDiskSpace.ps1
# Remove known temp and unwanted files
#.DESCRIPTION
# ===== How to use this script =====
...
#.PARAMETER MinimumFreeMB
#.PARAMETER FileAgeInDays
#.PARAMETER ProfileAgeInDays
...
Write-LogMessage -Message "Attempting to get $('{0:n0}' -f $MinimumFreeMB) MB free on the $env:SystemDrive drive"
$StartFreeMB = Get-FreeMB
Write-LogMessage -Message "$('{0:n0}' -f $StartFreeMB) MB of free disk space exists before cleanup"
#Purge Windows memory dumps. This is also handled in Disk Cleanup Manager
Remove-File -FilePath (Join-Path -Path $env:SystemRoot -ChildPath 'memory.dmp')
Remove-Directory -Path (Join-Path -Path $env:SystemRoot -ChildPath 'minidump')
#Purge System temp / Windows\Temp files
Remove-DirectoryContents -CreatedMoreThanDaysAgo $FileAgeInDays $([Environment]::GetEnvironmentVariable('TEMP', 'Machine'))
#Purge Windows Update downloads
Remove-WUAFiles -Type 'Downloads' -CreatedMoreThanDaysAgo $FileAgeInDays
Remove-CCMCacheContent -Type SoftwareUpdate -ReferencedDaysAgo 5
#Compress/compact common NTFS folders
Compress-NTFSFolder
If (-not(Test-ShouldContinue)) { Write-LogMessage 'More than the minimum required disk space exists. Exiting'; Exit 0 }
##################### Cleanup items if more free space is required #############
If (Test-ShouldContinue) { #Purge ConfigMgr Client Package Cache items not referenced in 30 days
Remove-CCMCacheContent -Type Package -ReferencedDaysAgo 30
}
If (Test-ShouldContinue) { #Purge ConfigMgr Client Application Cache items not referenced in 30 days
Remove-CCMCacheContent -Type Application -ReferencedDaysAgo 30
}
...
$EndFreeMB = Get-FreeMB
Write-LogMessage -Message "$('{0:n0}' -f $($EndFreeMB - $StartFreeMB)) MB of space were cleaned up"
Write-LogMessage -Message "$('{0:n0}' -f $EndFreeMB) MB of free disk space exists after cleanup"