What is Copilot Studio? The Architecture of a Custom Copilot
Interested in learning about Microsoft Copilot Studio? Then this article and video are perfect for you. Today, we’re covering:
This interface has a lot of stuff, but it’s not as complicated as you think. I’ll give you a quick tour of the interface and discuss the major components of a Copilot. I’ll also address everything in the Copilot Studio that you’ll use when building a custom Copilot. Let’s get into it.
What is Copilot Studio?
We’ll start by jumping straight into Copilot Studio.
Microsoft describes Copilot Studio as a comprehensive conversational AI platform that allows you to create AI agents (imagine a more advanced chatbot) using either natural language or a graphical interface.
With Copilot Studio, you can build, test, and launch AI agents that are tailored to your business’s specific needs, no matter your industry, department, or role.
How do you access Copilot Studio?
You can access Copilot Studio by just going to CopilotStudio.Microsoft.com. You’ll have two different ways you could license this:
- Copilot Studio License through Copilot for Microsoft 365
- If you’ve got Copilot for Microsoft 365, you’ll be able to use Copilot Studio to create some things, such as building simple conversational bots to use in Teams.
- Copilot Studio License through a Tenant License
- You’ll need a tenant license if you want to create full-blown custom Copilots, such as standalone chatbots. In the United States, it’s $200 per tenant per month. A tenant license for Copilot Studio allows you to create unlimited chatbots.
A final option is the Copilot Studio free trial, which allows you to start playing around with this stuff.
What’s included in Copilot Studio?
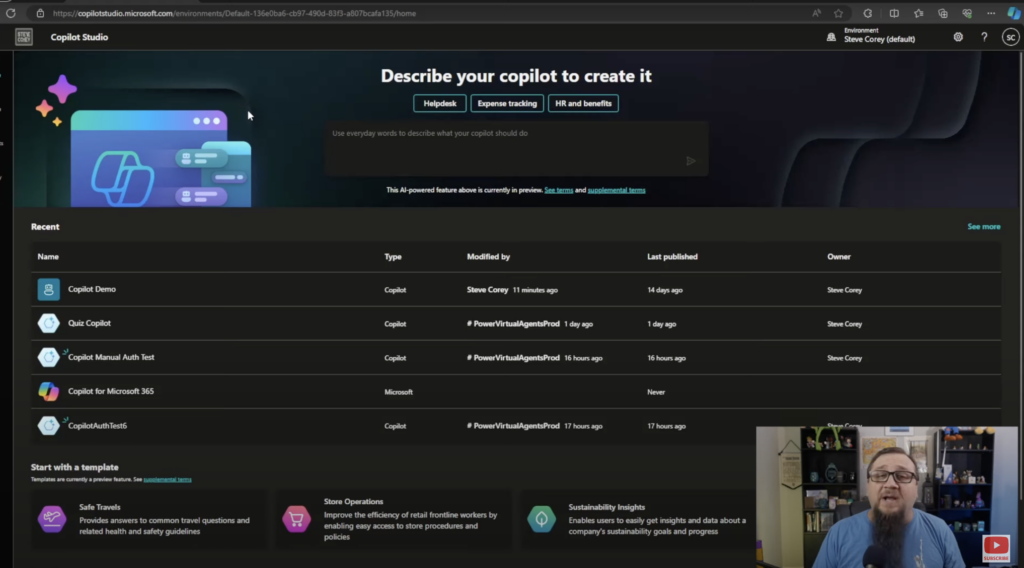
I’m going to open up a Copilot that I’ve created. I’m just I’m playing around with it. Across the top, you’ll see all the different components that make up this particular Copilot. We will cover each of these six components step-by-step so that you understand where these things fit in the grand scheme of Copilots.
1. Overview
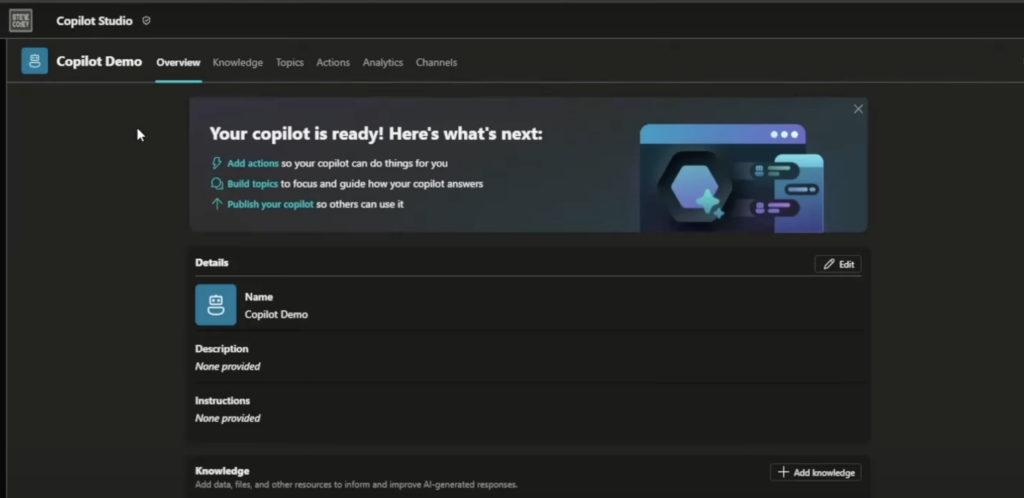
The Overview component is self-explanatory. Here, you’ll find general information about your Copilot.
2. Knowledge: Making the Copilot Your Own
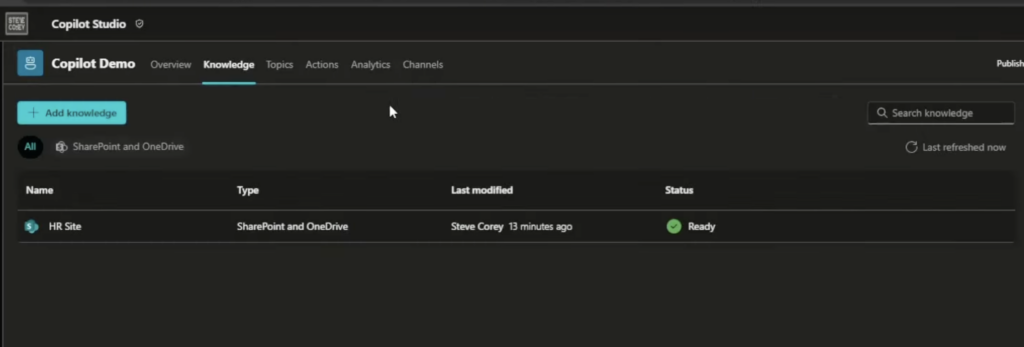
You’ll see Knowledge as the first option here after the Overview tab. This component lets you bring in just what it says: Knowledge.
The Knowledge tab is where you add extra information that your Copilot can use to fuel its conversations with users. This information can come from many sources, such as OneDrive, SharePoint, Data Verse, and more.
Bringing external “knowledge” into Copilot Studio is essential because, without that external information, Copilot can only act as a basic ChatGPT. We need to provide a base level of your business knowledge so that Copilot can offer educated insights and answers to users.
3. Topics: What talking points will your Copilot have?
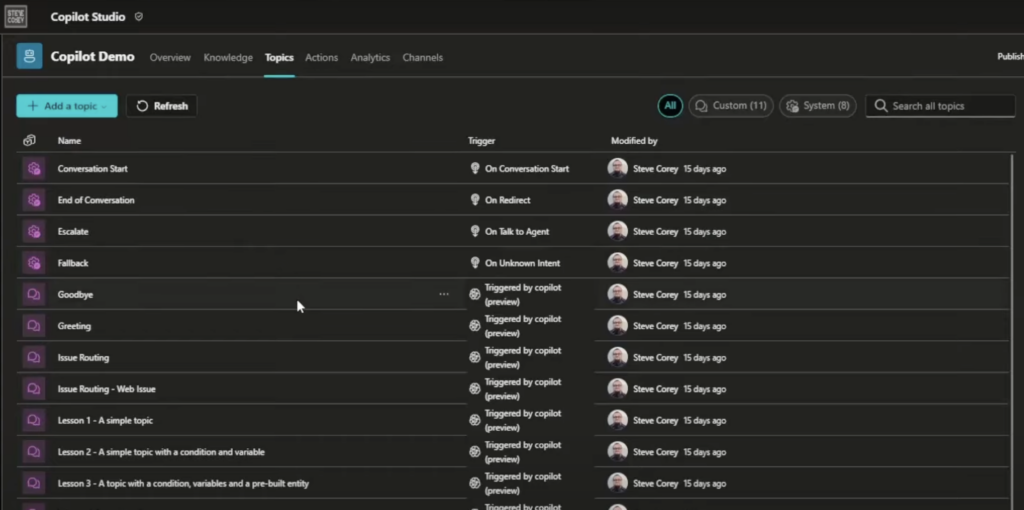
The Topics tab is where the conversation part really starts to come into play. Your Topics are what makes a Copilot into a chatbot.
If you click on Topics, you’ll see a bunch of different Topics listed. Most are already predefined by Microsoft, but you can also create Topics for yourself, as I have.
Your Topics help drive the conversation. For example, your users might be trying to:
- Request information
- Troubleshoot
- Take a particular action
No matter what your Copilot is for, you’ll need to map out how the information — or Knowledge — comes together to do what the user needs. You define this using Topics.
Topics in Copilot Studio allow you to map conversations or parts of a conversation out in a flowchart style. If you’ve used Power Automate in the past, you’ll be familiar with this flowchart style of building. All you need to do is build out that conversation, including things like:
- What questions might be asked by users?
- What information-gathering questions might the Copilot need to ask the user?
- What should the return messages to users look like?
One of these flowcharts equals one Topic, usually focused on a small area of information at a time. You’re able to create a ton of these to build out your Copilot.
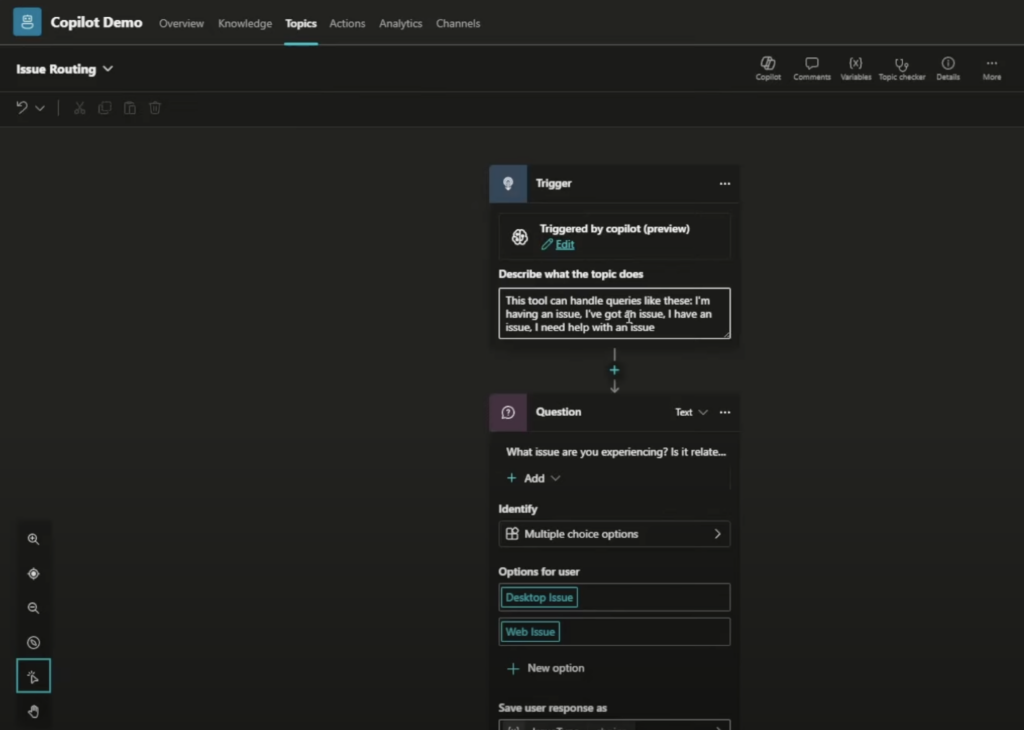
For example, if we click on the Issue Routing Topic, there’s a place to include a description at the beginning of the flowchart that tells us what it does.
Each Topic is then assigned a trigger. The trigger could be a certain phrase, action, or question. Once triggered, the Topic will take the user through the rest of the flowchart.
When the user reaches the end of one Topic’s flowchart, it may end the conversation, or it might jump to another topic and start down another flow of interactions with the user.
Topics are really the heart of a custom Copilot: This is a collection of topics that the end user will go through based on what they’re asking the Copilot.
4. Actions: What Will Your Custom Copilot Do?
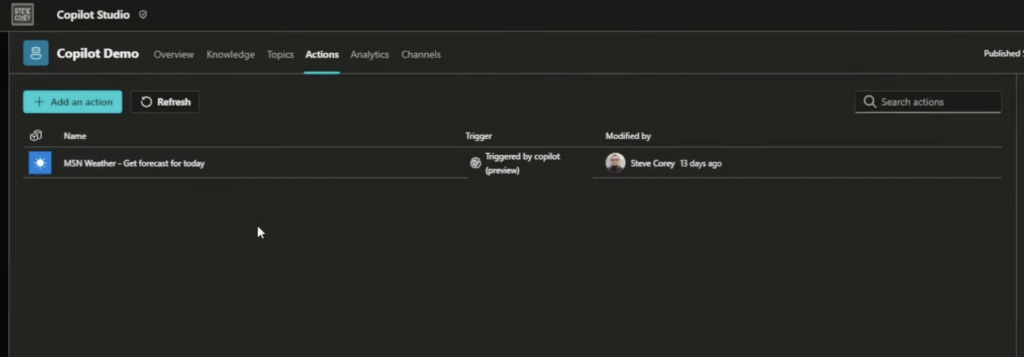
Actions open up a plethora of possibilities for your custom Copilot. The Action tab is where you add advanced functionality to your Copilot by allowing it to bring in data from an external source. This allows your Copilot to do more than simple question-and-answer interactions with a user.
I’ve defined one Action here: the MSN weather forecast. If somebody asks for the weather, this Action gets called. In this case, the external source your Copilot is pulling from would be the MSN weather forecast.
5. Analytics: Monitoring and Maintaining Your Copilot
In the last 4 sections, we’ve covered the core components of building a custom Copilot using Copilot Studio. But what happens after you’ve deployed your Copilot out to the world? How do you keep your Copilot running smoothly?
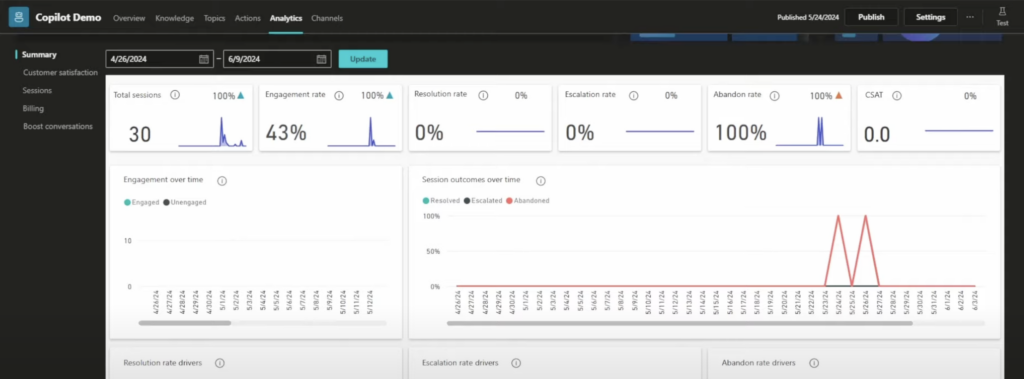
That brings us to the next tab: Analytics. Part of maintaining a Copilot is ensuring it serves the needs that it was designed to serve. You’ll need to see how users are interacting with it and where you can improve its functionality. The Analytics tab is your key to improvement.
Remember, custom Copilots are not designed to support a “set it and forget it” approach. You’ll have to monitor the Analytics on a routine basis so that you can improve your Copilot for the end users.
If it doesn’t work for end users and they’re not getting the information they need, they will stop using it. You will have wasted all that effort building a custom Copilot! Your users will likely go back to doing things the old, time-consuming way, or they will do without that information entirely. Interation and continuous improvement are very important when it comes to building a great custom Copilot.
6. Channels: Where Will Your Copilot Live?
Now that you’ve done all the configuration and debugging for your custom Copilot and understand how to monitor it, you just need to deploy it. That’s where the Channels tab comes in. Channels define where you want your custom Copilot to live once it’s been built.
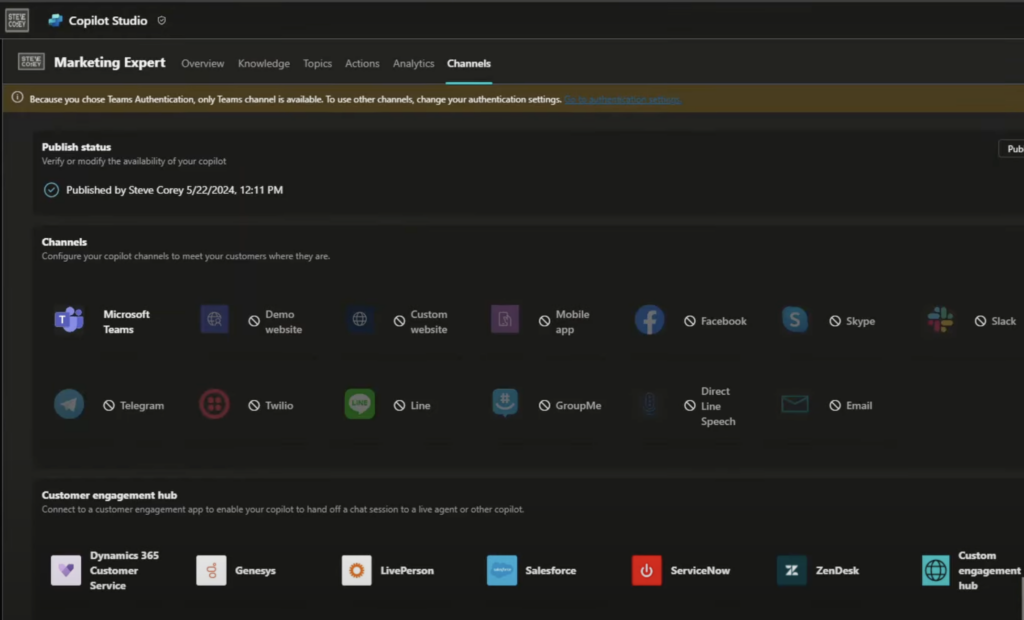
The Channels tab allows you to set where your Copilot will appear for users, whether in Microsoft Teams, SharePoint, a custom website, etc.
By default, it will allow you to deploy to Microsoft Teams. However, with some extra setup, you can also deploy to other Channels.
You can even deploy your custom Copilot to Slack and other places outside of the Microsoft ecosystem. It requires extra steps like setting up different authentication mechanisms, but being able to host your Copilot across many different applications and sites is a nice feature in Copilot Studio.
Conclusion
I hope this blog has helped you understand the roles of each of the different tabs and how these components all work together in Copilot Studio to produce one singular custom Copilot.
Is your organization looking to leverage Copilot and Copilot Studio, but don’t know where to start?
Resources
Subscribe to my YouTube channel to get more content about Copilot Studio, Copilot, and more: https://www.youtube.com/@stevecorey365
Try Copilot Studio for yourself: https://copilotstudio.microsoft.com/

;)
