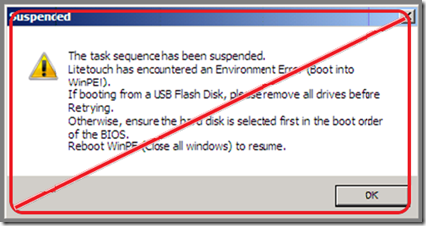


This blog is looking at the Microsoft Deployment Toolkit Lite Touch (LTI) and the error: “The Task Sequence Has Been Suspended”
This is basically the result of the the system coming up in an OS it didn’t expect.
For example WinPE instead of XP/Win7.
Commonly, you might be testing and have restarted the box in the middle of the Task Sequence running. Or perhaps you did a deployment and didn’t click “Finish” on the summary screen. The appropriate action is to either click “Finish” or reboot into the appropriate OS.
You can also hit F8 at this point and format the drive and then restart or manually kick off the Lite Touch process again. If you want an automated way to deal with this, which is most likely unsupported, read on! Normally when you click “Finish” the Task Sequence will exit and clean up after itself.
There is a script called LTICleanup that runs.
What we came up with at a recent client of mine, was developed for a lab environment. To avoid this pesky screen, we added the LTICleanup script to to the WinPE load process to automatically clean up the drive for us every time we load WinPE. The obvious advantage is that we will never seen the above error. However you will also lose all your log files if you just had a failed deployment.
To counter that, I always recommend you take advantage of SLShare (logs copied at end of deployment) and SLShareDynamicLogging (logs copied during deployemnt) so that you have copies of what happened and can still troubleshoot the process.
See the MDT documentation for more information on these properties. First what you need to do is pull the unattend.xml from the boot image. You will need one for each architecture x86 and x64. You can use imagex to mount the litetouchpe_x64 or litetouchpe_x86 and then extract the unattend.xml. Once you have this, you will want to place it in your Extrafiles directory.
This allows us to make changes without having to manually mount the boot media everytime.
When changes are made, the boot media will be updated and the unattend.xml injected into the boot media. The unattend.xml will go in the root of your Extrafiles directory. DeploymentShareExtrafilesx86unattend.xml DeploymentShareExtrafilesx64unattend.xml Next we need to open the unattend.xml with Windows System Image Manager.
What you’ll see is that there is a RunSynchronous that calls the LiteTouch.wsf script to start the process. What we want to do is add a step right before that to call LTICleanup.wsf before LiteTouch.wsf attempts to load.
First change the Order to “2” on the existing step.
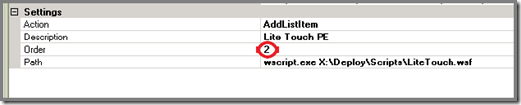
Next add a new step that calls LTICleanup.wsf

Do this for both the x86 and x64 unattend.xml files to ensure this process works on both platforms.

Now every time WinPE loads, it will first run LTICleanup, then it will launch the wizard. x64 If you want to test this solution, just restart in the middle of a Task Sequence, and then immediately boot to WinPE.
You should receive the welcome screen instead of the “This Task Sequence has been suspended” error message.